By 2019, 1 billion users will use in-store mobile payments. 61% of banks will increase their spending on mobile payment technology during 2018 – a 52% increase from 2017.
These are just two of thousands of statistical reporting doing rounds whenever the mention of Mobile Payments come up. And these numbers are too far from reaching a bubble. The widespread adoption of the technology will only become too mainstream with the growing Generation Z inclination towards it.
For an app brand to be in trend, in not just this year but also for the future to come, it is either investing in P2P Payment App Development or that they have introduced the in-app payment option.
This article is for everyone who plans on adding ‘Click to Pay’ option in their mobile apps. Depending on what purpose you intend your app to solve, there are a number of ways in which your user would move inside the app. Knowing this is a good place to start as you would get the talking points to discuss with your mobile app development company whom you would be entrusting with an integration of the most in demand technology.
So, here we go.
This is how users will move inside your app once you give them the option to make payments from within the application. The movement that will impact your payment gateway integration process.
A Users’ Journey Walk-through within an App offering in-app Payment Facility
When we talk about making payments using mobile, there are usually two scenarios that can occur. Either A. You would be doing a peer to peer transaction or B. You will be purchasing an item or service online.
The third scenario that has been doing rounds in the mobile payment industry is making payments in store with a touch of the device, using NFC (whose market by the way By 2020, is expected to reach $130 billion mark).
Let us discuss them all in detail –
When you are transferring funds between people you know
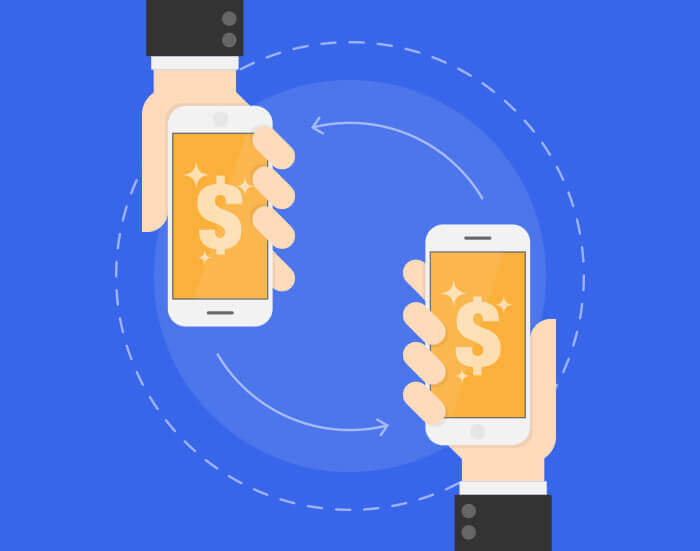
The event occurs when you transfer funds between people you know. It can be for splitting bills or paying rent, among a number of other uses.
The route that such app users generally follows is that they first add their card details in the app and create a wallet in the application.
The app syncs with the contact of all those people who are in user’s device who are also using the same app. Then, the user selects the contact they have to transfer funds to using their number from within the app and enter the amount that has to be transferred.
Next, they have two options – Either get the amount deducted from what they have in their wallet or get it debited from their debit/credit card by entering their card information.
BY selecting the wallet option, the users can directly get the amount deducted and transferred. But when they choose the card option, the app connects with the merchant bank and ask for details like OTP and CVV in every transaction, before initiating transfer of funds.
Whichever way they choose, the amount gets deducted and sent to their peer in a few clicks, and the app returns with a payment receipt.
When you are purchasing something on Mobile
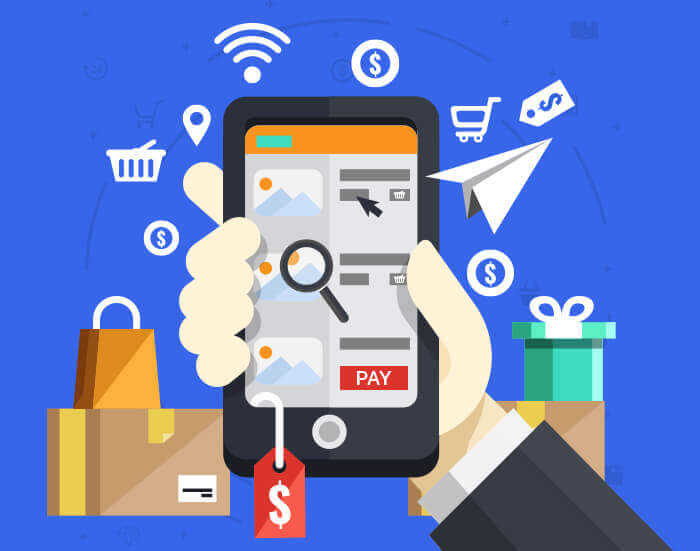
When your user finalize something to buy in the mobile commerce application, they add the item in cart. Next, they choose ‘buy now’ option, which directs them to pages where they add their address details, view the product detail and ultimately comes at the payment information page.
It is in this screen, that they enter their card details – Number, Name, CVV, and Expiry Date. The app then connects with the bank and opens a payment gateway screen, where users are asked to feed in the OTP that the merchant bank sends to their devices and email id.
Upon entering the details, the purchase cycle ends.
When you are making payments in store using NFC Technology
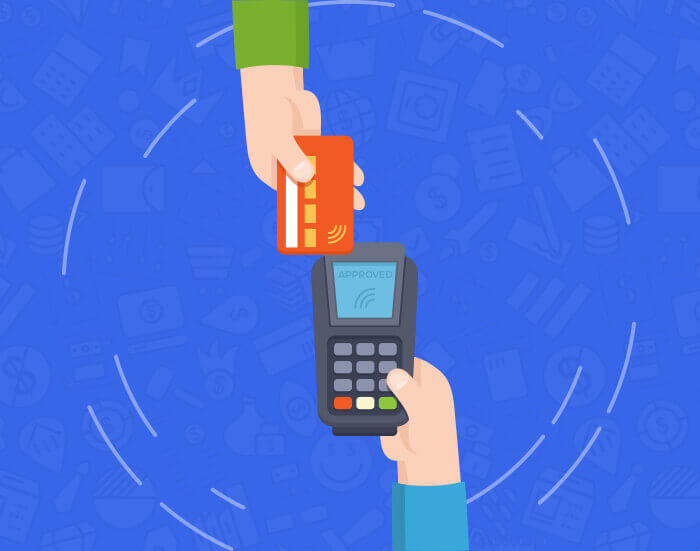
One of the latest advancements in mobile payment industry, this payment mechanism works on bringing the mobile device with the app close to a device that works on NFC. By bringing the app and device in contact, the amount automatically gets deducted from the user’s account and goes into the outlet’s merchant account.
The app in this case, stores card information that gets read by the device in one tap, which then encrypts the data transmitted in a particular transaction with a one-time token system. Every time a transaction is implemented, the phone gives a distinct token to terminal. When it arrives at the linked banking institution’s firewalled servers, the token is then processed and decrypted.
Once the process of decryption is over, the amount gets transferred from user’s bank to the outlet’s account.
Now that you have measured the growing demand of Mobile Payment and know how users would move inside your app, it is time we get into the nitty-gritties of the features that you will be discussing with your mobile app integration company.
From here on, you will read about:
- Things that you should consider before you decide to add Payment option in your app.
- Details on the most used Payment Gateways.
- Integration of one of the most popular Payment Gateway – Stripe, in Android and iOS App.
- Time and Cost involved in Integrating Payment option in your app
Now that you know how a payment gateway works, hang on. It is going to be a long read. You will be deep diving into elements that will prepare you for the payment gateway integration process in your next Mobile Application.
Let’s start –
Things you need to consider entering into the payment gateway integration process
Account Type
There are two kinds of seller accounts – Dedicated and Aggregate accounts.
Dedicated Account – it is that merchant account which is set for just one merchant. The account is set up specific to your business transaction need.
Implementing dedicated account requires a hefty expenditure budget, which can come across as a challenge for small level enterprises.
While it allows you to have personalized account type, the longer payment processing time and a thorough check into the business accounts, take people away from the account type.
PayLeap and Authorize.net are the two most used Dedicated Accounts.
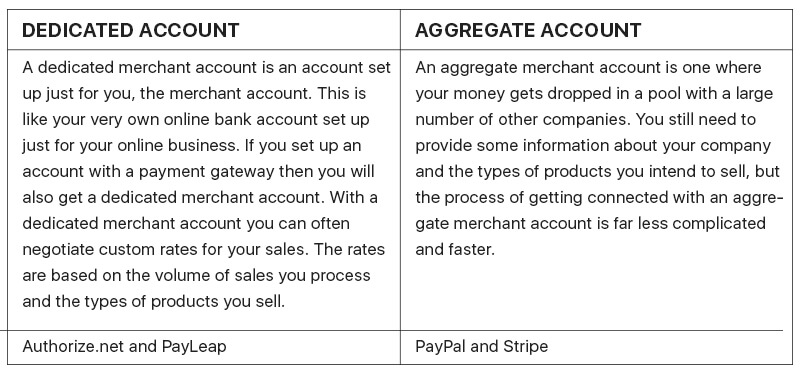
Aggregate Account – it is the merchant account where you can store your funds along with that of other merchants’. Although you are required your information in this account type as well, the acquisition rate is higher and the process is much less complex than Dedicated Accounts.
PayPal and Stripe are the two most popular, most used Aggregate Accounts that are used by companies to implement in their mobile apps.
Type of product you are selling – Content or Material
The electronic money system that you choose will vary according to the type of product that you are selling through your app. While you will have integration options when selling a physical product. Selling digital merchandise can come across as a challenge.
When selling digital merchandise, App Store and Play Store doesn’t allow using third party e-commerce services, when the app is distributed through their storage. To make transactions, your app must use only the platform specific accounts – Apple or Gmail.
Security compliances

To legally handle the user personal banking information, you will have to buy a PCI DSS compliance certificate. Even if you are using a trusted payment gateway like Stripe or PayPal, you will have to acquire the certificate. The process of which is –
First, prepare information system which stores user card data, so that all the requirements of PCI DSS are fulfilled.
Once made, your app system will be audited by authorized PCI Security Standard Council companies, based on which you will be issued the certificate.
Dispute Management
Another very important element to consider is how you will handle disputes when they occur. There can be a lot of incidents when the users might not receive the fund on time, he gets some other amount than the one decided upon.
The merchant might say he has processed the refund but it doesn’t reach the user, etc. In order to handle cases like these and many more, it is important that you have a proper dispute management system in place.
Brands like FSS and ACI Worldwide offers dispute management systems to merchants getting associated with them. But, even if you don’t want an association with them, you can ask your mobile app development company to create a process for this. Having it in place, will only help you get the PCI DSS compliance certificate faster.
Since you now know the factors that have to be considered when introducing the Payment gateway integration process in your app, let me now take you through the various payment gateways that are being used by brands to make their payment process easier and universal.
Although they all have near about same charge plans, I would recommend that you do an in depth study into each of the online payment gateways to make your choice.
The Most Used Payment Gateways for Mobile Apps
PayPal
Being the most used payment gateway, across borders, PayPal has been offering mobile payment services since a number of years. The easy to learn is ideal for those looking to enter the e-commerce industry and are still not sure about it all functions.
It allows you to sell goods at 2.9% + 30 per transaction amount.
Braintree
The gateway is present in over 40 countries, offering support to more than 130 currencies. The platform has SDKs in more than seven programming languages, workable on both iOS and Android.
There is no fees on transactions for the first $50K evaluation. Once your income supersedes the amount, they charge 2.9% and 30 for every transaction.
Stripe
The Payment Gateway is aligned with the services offered by some of the most trusted payment gateways. The platform offers authorization, checkout facility for desktop and mobile, analytics, and a number of other options.
Cost wise, Stripe is same as that of PayPal – 2.9% and 30 per transaction.
Authorize.net
Existing majorly in the US and Canada, Authorize.net gives users a dedicated merchant account. The brand offers solutions for both website and mobile. It also offers a number of other features including – information management, fraud detection, PCI DSS compliance, and recurring billing system.
Being a dedicated account, Authorize.net is more expensive than its aggregate counterpart. To start with, you will have to pay $49 to begin and then the monthly gateway charges is $25. Other than that, you will have to pay 2.9% + 30 per transaction for every transaction you make.
Network International
Network International is Middle East and Africa’s most used payment gateways. Backed by high security levels, easy refund options, and effortless checkout, the platform offers customized solutions which can be modified according to industry and business type.
Beside the option to customize, Network International gives benefits like Tokenization, PayPal Checkout, Account Monitoring services, amongst many others.
While all of the online payment gateways that we mentioned above are the ones we swear by, when it comes to a secure, efficient, and trusted platforms, Stripe is the one that we get maximum demand for when it comes to Mobile Payment Gateway Integration.
So, below we have given the exact payment gateway integration process of how we add Stripe payment option in the Android and iOS apps that we develop
Disclaimer: Heavy Coding Involved
How to Integrate Mobile App Payment in Android and iOS
Stripe has a Java library specifically for Android that allows you to submit payment through an Android app. Instead of sending the card data to server, the library send data to Stripe’s servers, where it gets converted into tokens.
The app receives the token and then sends it to endpoint on your server. You can either use the token to process the payment instantly, do recurring billing, or simply save the data for future use.
Let’s look at the technology stack of integrating Stripe in your Android app.
Integrate Mobile Payment in Android App
1. Installation
By adding following in your app project’s build.gradle file, under the dependencies section, you will be able to install the Stripe Android library.

2. Collecting Card Details
Obtaining payment details is the foundation of your app, everything revolves around it. There are a number of ways you can achieve it –
Making use of Android Pay to access the card information
Use Stripe’s own card input widget to gather information
Build credit card form
For this article, we are going to focus on how to build your own credit card form. The one where you can add elements as per your need.
When building your own form, you will at least need customer’s card number, expiration date, and CVV. You can even ask for their name and address for that added level of security. After collecting the information, you will have to exchange that information with Stripe to for acquiring a token.
2.1 Making and Validating Cards using Custom Form
To make a Card object from the information that you have collected from other forms, one can make an object with its constructor.
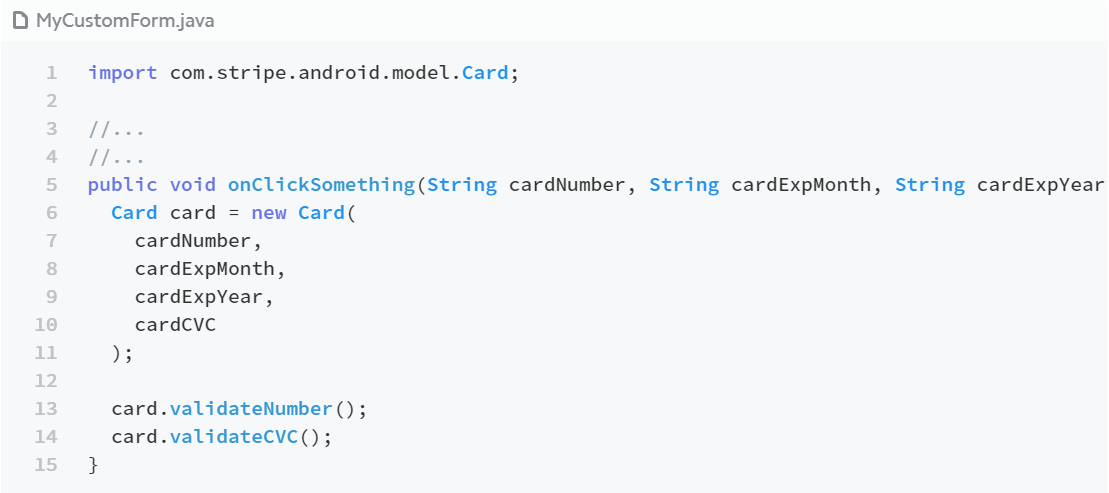
As seen in the image above, the Card instance consists of helpers to ensure that card number passes the Luhn check and that the expiration date is of the future and that the CVV number is entered.
But since you would want to validate all the three things together, here is a ValidateCard function, which will help you do just that.
3. Creating tokens
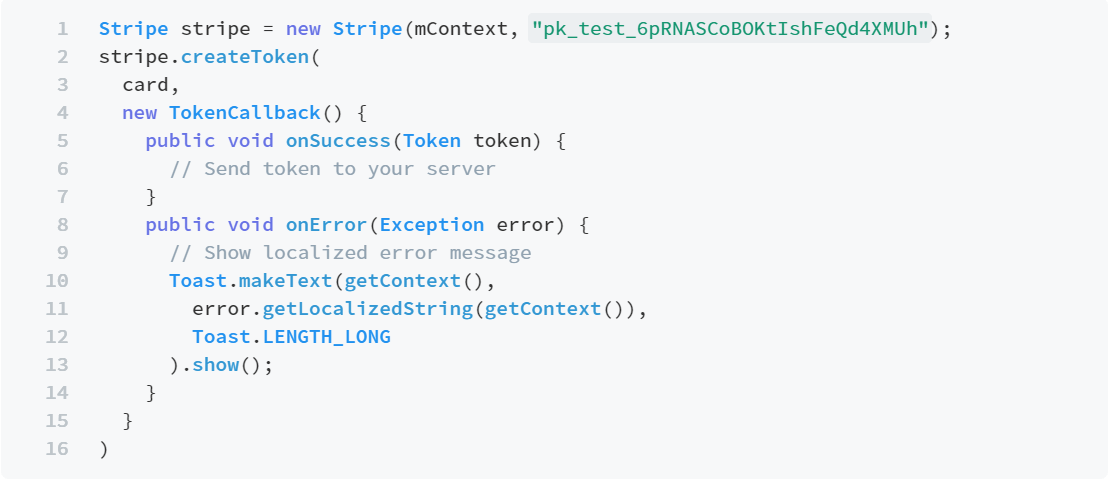
After you have collected the data, it is time to send the data to Stripe to exchange it for a Token. You can create tokens this with the help of Stripe instance method – createToken then passing it in Card instance and finally completion callbacks. By doing this, one asynchronous request will get executed and a callback will be invoked as soon as it completes.
At this stage, note that you will be needing an access to one Context object that can be in the Fragment or Activity where you are presently operating, or it can be recovered from a View with the help of View#getContext() process.
To do this, you will have to start with importing the Stripe and Token object.

Next, get Card object. It can be done using a custom form.

If taking the data from the CardInputWidget –

Now that you have created the Card object, you can only convert it into a token. You cannot save the object locally.
4. Using Tokens
Making use of the payment token, as it was received, needs an API call from your server with your API key.
To do that –
Set an endpoint on server, which can receive HTTP POST call for token. Since you are using your own form, you will have to POST the supplied token in the on Success callback to your server. But before you do that, make sure that all the connections to your SSL are secured.
5. Charging the Card
Card Charge attempts are done from the server unlike Tokenization, which is done in browser. To do this you will have to make use of the Stripe client library that can be installed in any of the following languages – curl, Ruby, Python, PHP, Java, Node, Go, .NET.
On the server, get the Stripe token in POST parameter which are submitted by your form. Follow with this to charge the card:
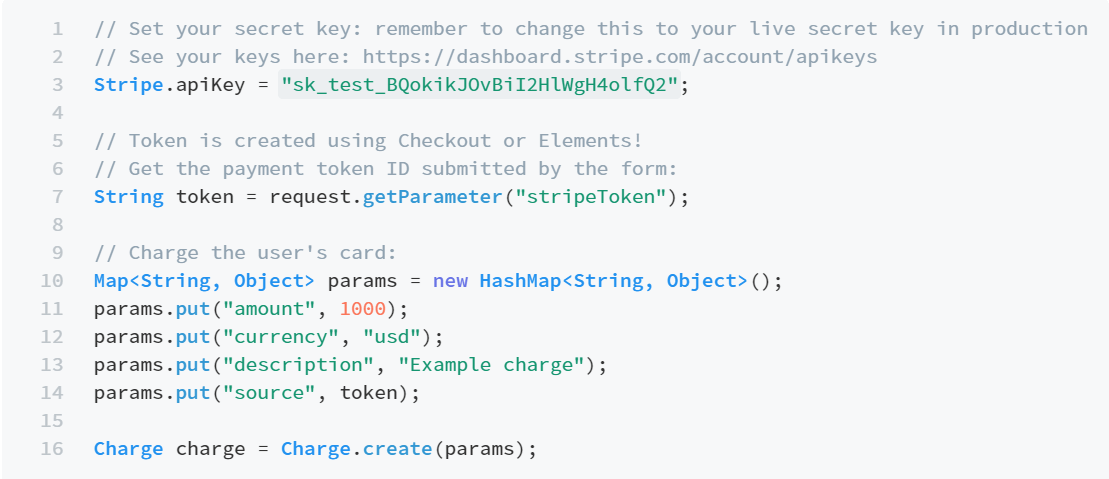
This is it. Now if the payment charge creation request gets accepted, the card will get charged successfully and you will receive the money in two days. If it fails, you will get an error notification.
There are other elements that you can add in your app as well, such as –
Managing Failed Payment and Decline
Saving Card Details for Future
Now that you know how to integrate Stripe Payment in Android app, let us now see how to make the integration happen in an iOS Application.
Integrate Mobile Payments in iOS Application
Stripe iOS SDK has made it easy to deliver excellent mobile payment experience in iOS app. The SDK is known for its features like customization, rich UI elements, and a powerful, protected interface.
Let’s start with the process now –
1. Install and Configure SDK
You can install the Stripe SDK through whatever process you are used to. Stripe supports the following tools – CocoaPods, Carthage, Fabric, Dynamic Framework, and Static Framework.
Let us look at the installation using the CocoaPods tool –
1.1. Install the most recent version of CocoaPods
1.2. Add this to your Podfile –

1.3. Run this command –

1.4. Replace .xcodeproj with .xcworkspace file to open project in Xcode.
1.5. To update the SDK version, run –
2. Configure Stripe integration in the App Delegate
Once you are done with the SDK installation, the next step is to configure that with your Stripe API keys. You can do this by using Swift and Objective – C.
Here’s how to use Objective – C
Once you are done with the steps, you will be able to integrate payment option in your iOS app.
Now that you know the technological steps it takes to integrate Stripe payment option in both Android and iOS, let us now look at the integration of another payment option – Bitcoin in a mobile app.
Let us now look at the time and cost involved with adding payment option in an app, making it trendy when it could have been ordinary.
Cost of Integrating Payment option in Mobile Apps
By integrating the payment option in your app, you get to add basic features like storing card information, linking bank with the app, and even add advanced level features such as refund management, monitoring window for the merchant, etc.
There are these and various other features that adds payment facility in any ordinary app.
Depending on what level of features you need in your app, the cost of Integrating Payment in your Mobile App can come somewhere around $2K which takes near-about seven days to completion.
In the end, let us look at the future that will be upon the Mobile Payment Industry, soon.
What’s next in the World of mPayments?
Rise of NFC
Some of the most famous mobile wallets, such as Apple Pay and Samsung Pay, relies on NFC Technology for initiating payments. The technology allows users to make purchases only by holding their mobile devices to an NFC enabled device. It’s not just convenient but it also speeds up the checkout time, drastically.
It also explains why global NFC Market is ready to grow at a CAGR of nearly 17.9% over the next few years to reach around $49.5 billion by the year 2025.
Bitcoin
Bitcoin is the biggest innovation that is ready to hit the payment industry this year. It will get introduced to mobile apps to a greater extent now, making the industry cashless and secure.
The fact that the monetary value of Cryptocurrencies are on a continuous rise is an indication towards how fast evolving the industry is and the role that it is set to play in the future of mobile payments.
With this, you are now prepared to make your app payment ready.
If you need to discuss any process or need help with the coding part, contact our Team of Experts.

strategies your digital product.


